How Webmasters Can Optimize Their Blogs with Webflow CMS Collections
For webmasters, a blog isn’t just about posting updates or news—it’s a carefully crafted pre-sales engine. Blogs warm up your audience and direct targeted traffic to affiliate offers scattered throughout your content, not as standalone ads, but as part of useful guides, reviews, or case studies. Managing this setup efficiently—especially as campaigns, offers, and GEOs rapidly change—can be tough.
This article focuses specifically on Webflow’s CMS Collections—one of its most powerful no-code features. We won’t cover Webflow’s visual design or hosting capabilities but instead show how CMS empowers webmasters to efficiently manage and scale content-driven blogs that support CPA arbitrage.
You’ll learn the core CMS benefits, common use cases, key field setups, editorial tips, and helpful advanced features.
How Webflow CMS Bridges Your Blog and Affiliate Campaigns
Unlike brand blogs, arbitrage blogs function as conversion funnels disguised as valuable content. Your articles, guides, and deep dives are tightly linked to current offers, traffic channels, and target GEOs.
Webflow CMS helps by:
- Centralizing content management: Say goodbye to repetitive manual page edits by storing all your articles in one CMS repository. Quickly update affiliate links or add new content without touching every page.
- Tagging content by GEO, device, or offer category: Dynamically filter your articles so users find content tailored for their region or device type—improving engagement and boosting conversion rates.
- Visual, no-code updates: Add or update blog posts and affiliate CTAs all through an intuitive interface, without dependence on developers.
How to Work with Webflow CMS: Step-by-Step Setup for Your Blog Page
Before diving into specific fields, here’s a clear, practical overview of building a CMS-powered blog page in Webflow:
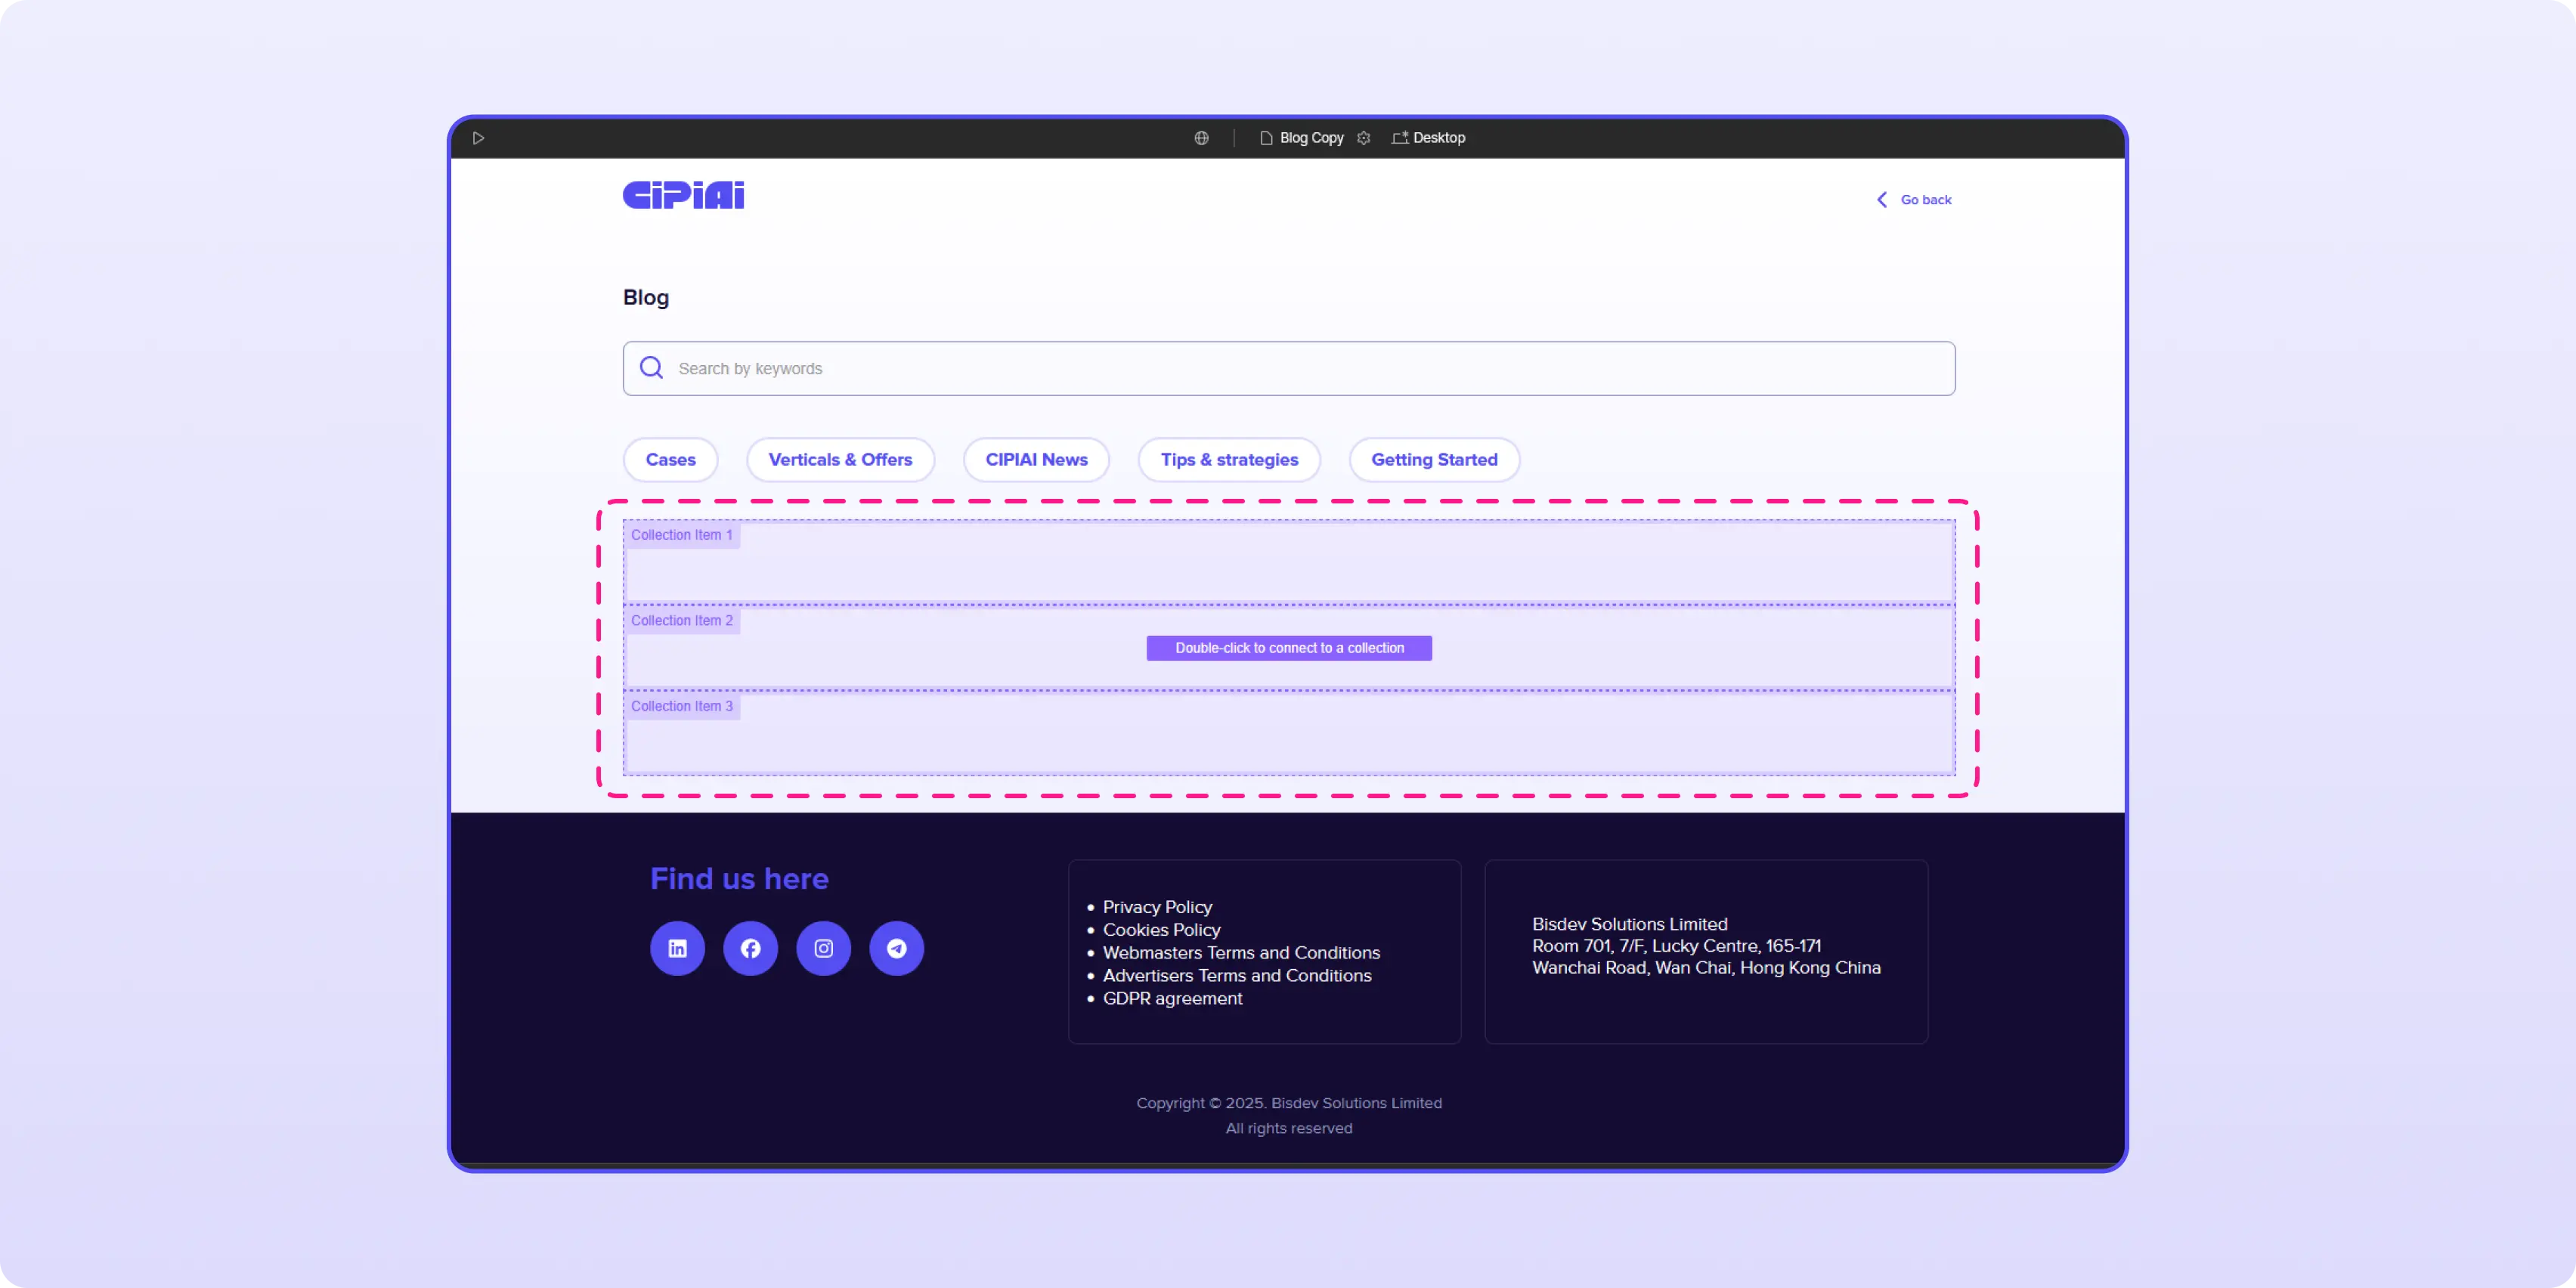
1. Create a New Page for Your Blog Listing
In Webflow Designer, create a new page or use an existing one to showcase your blog post listings. This page will serve as a dynamic hub displaying all posts from your CMS Collection. Add a Collection List element to the page.
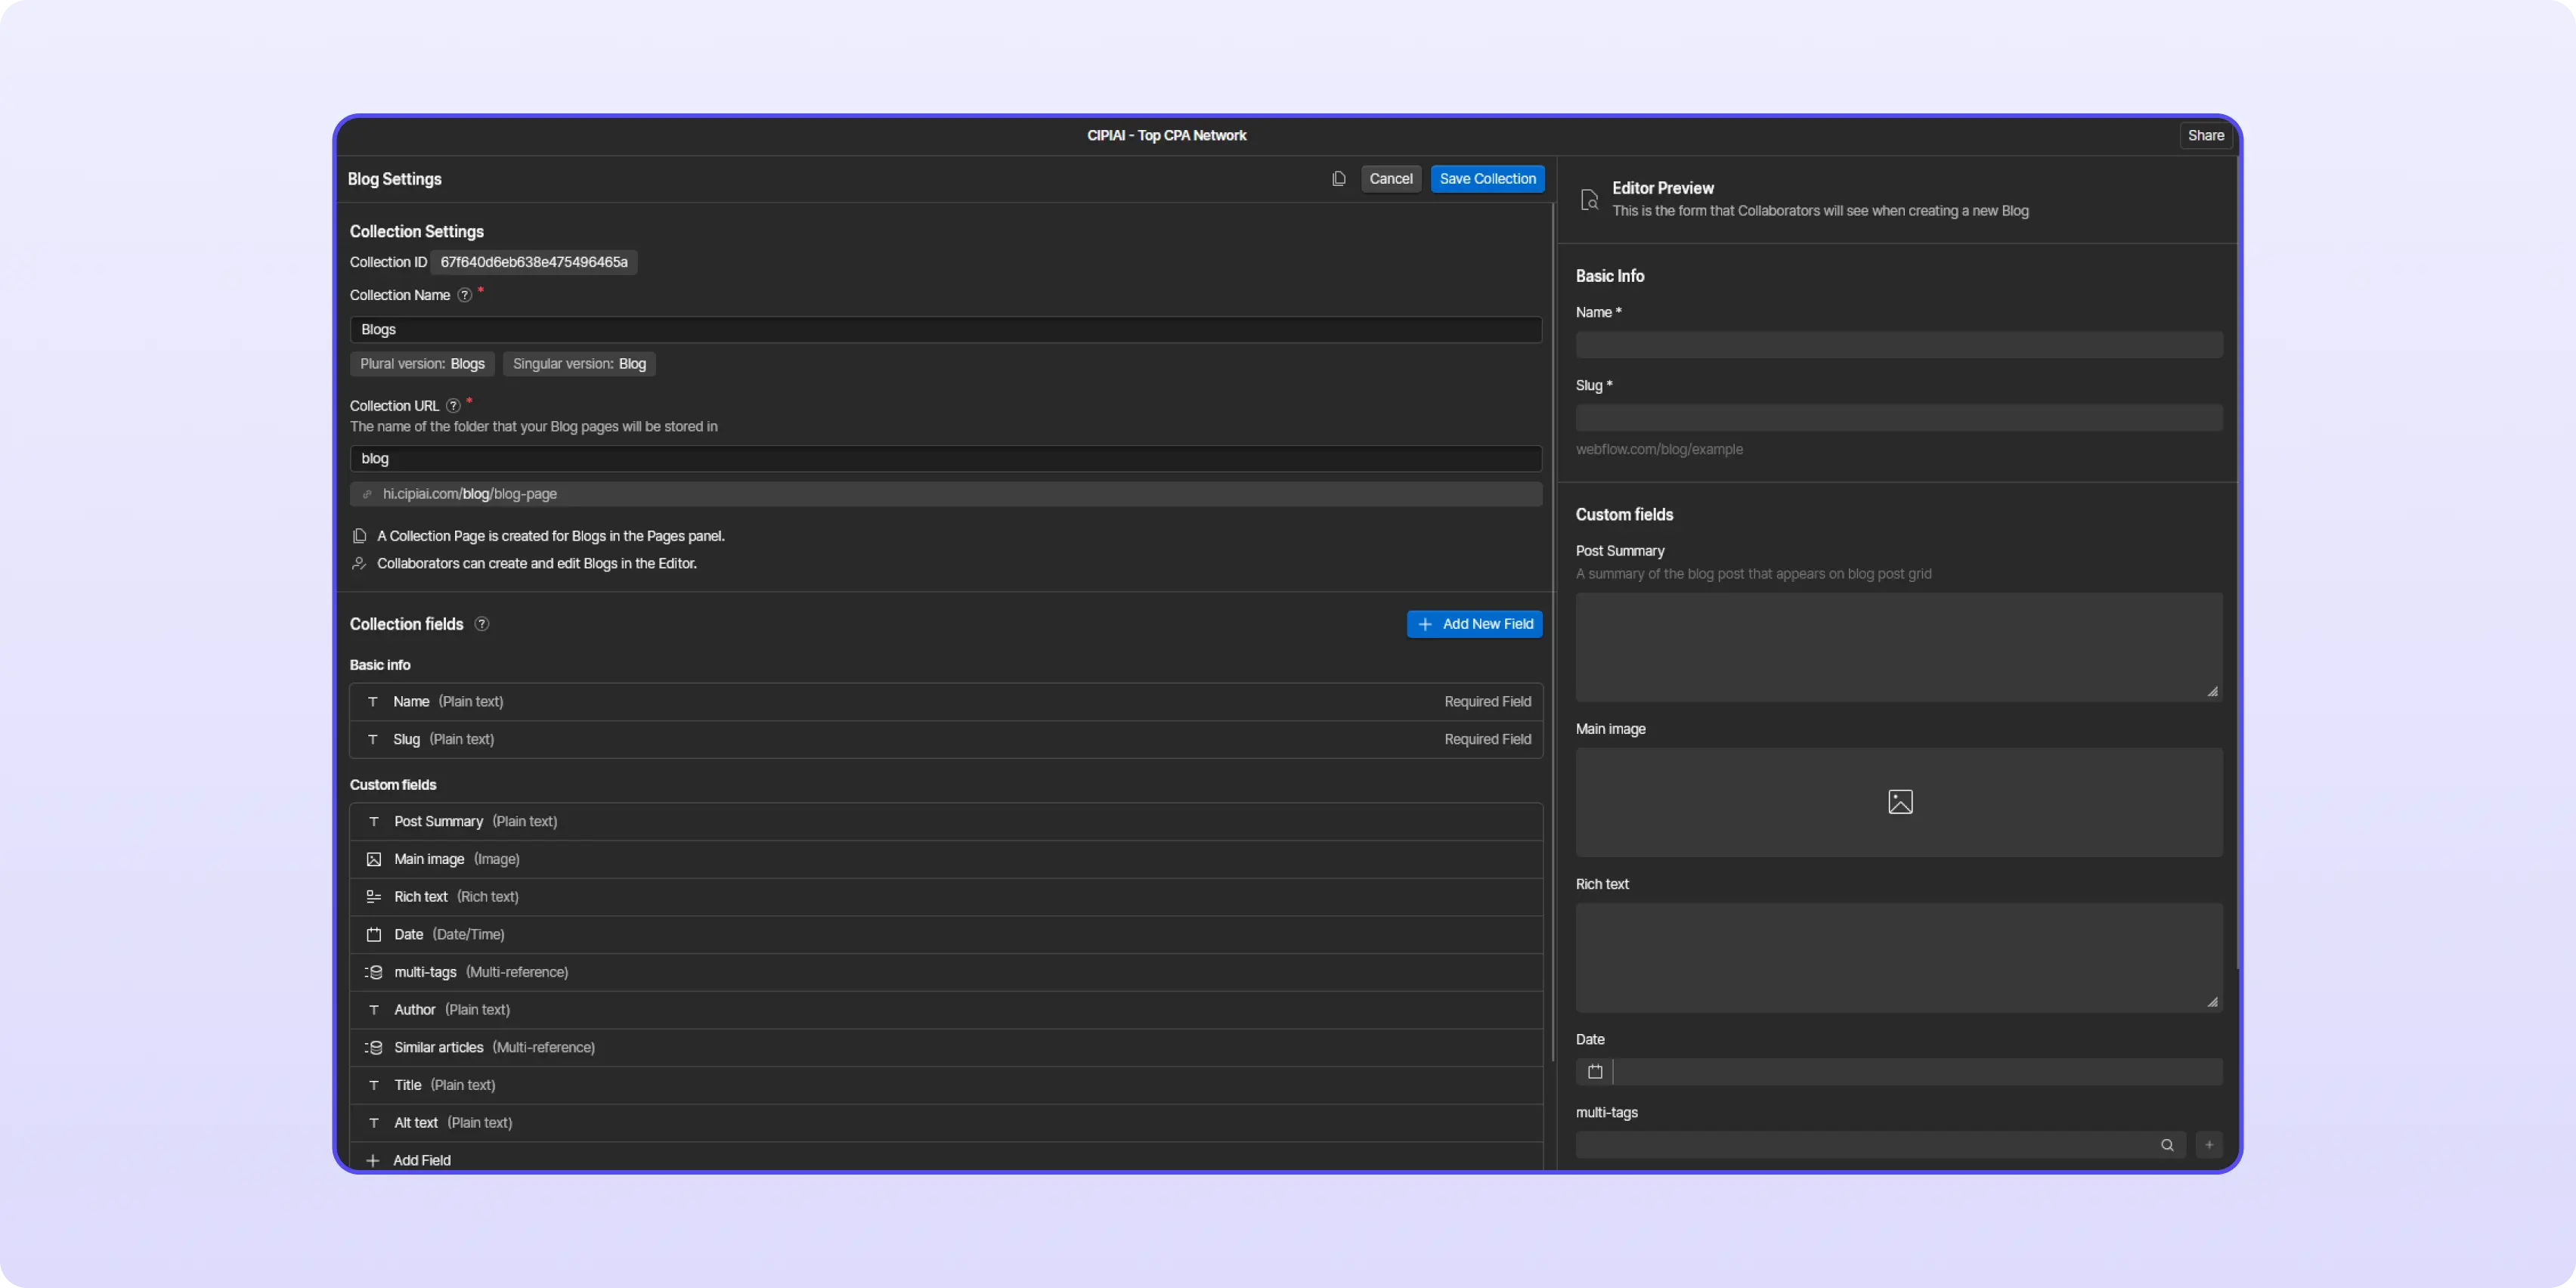
2. Create a CMS Collection
Open the CMS panel, click “Create New Collection”, and give it a name (e.g., “Blog Posts”, “Articles”, etc.). Define custom fields to structure your blog content. (Refer to “Recommended CMS Fields for Arbitrage & Tech Affiliate Blogs” for field suggestions.)
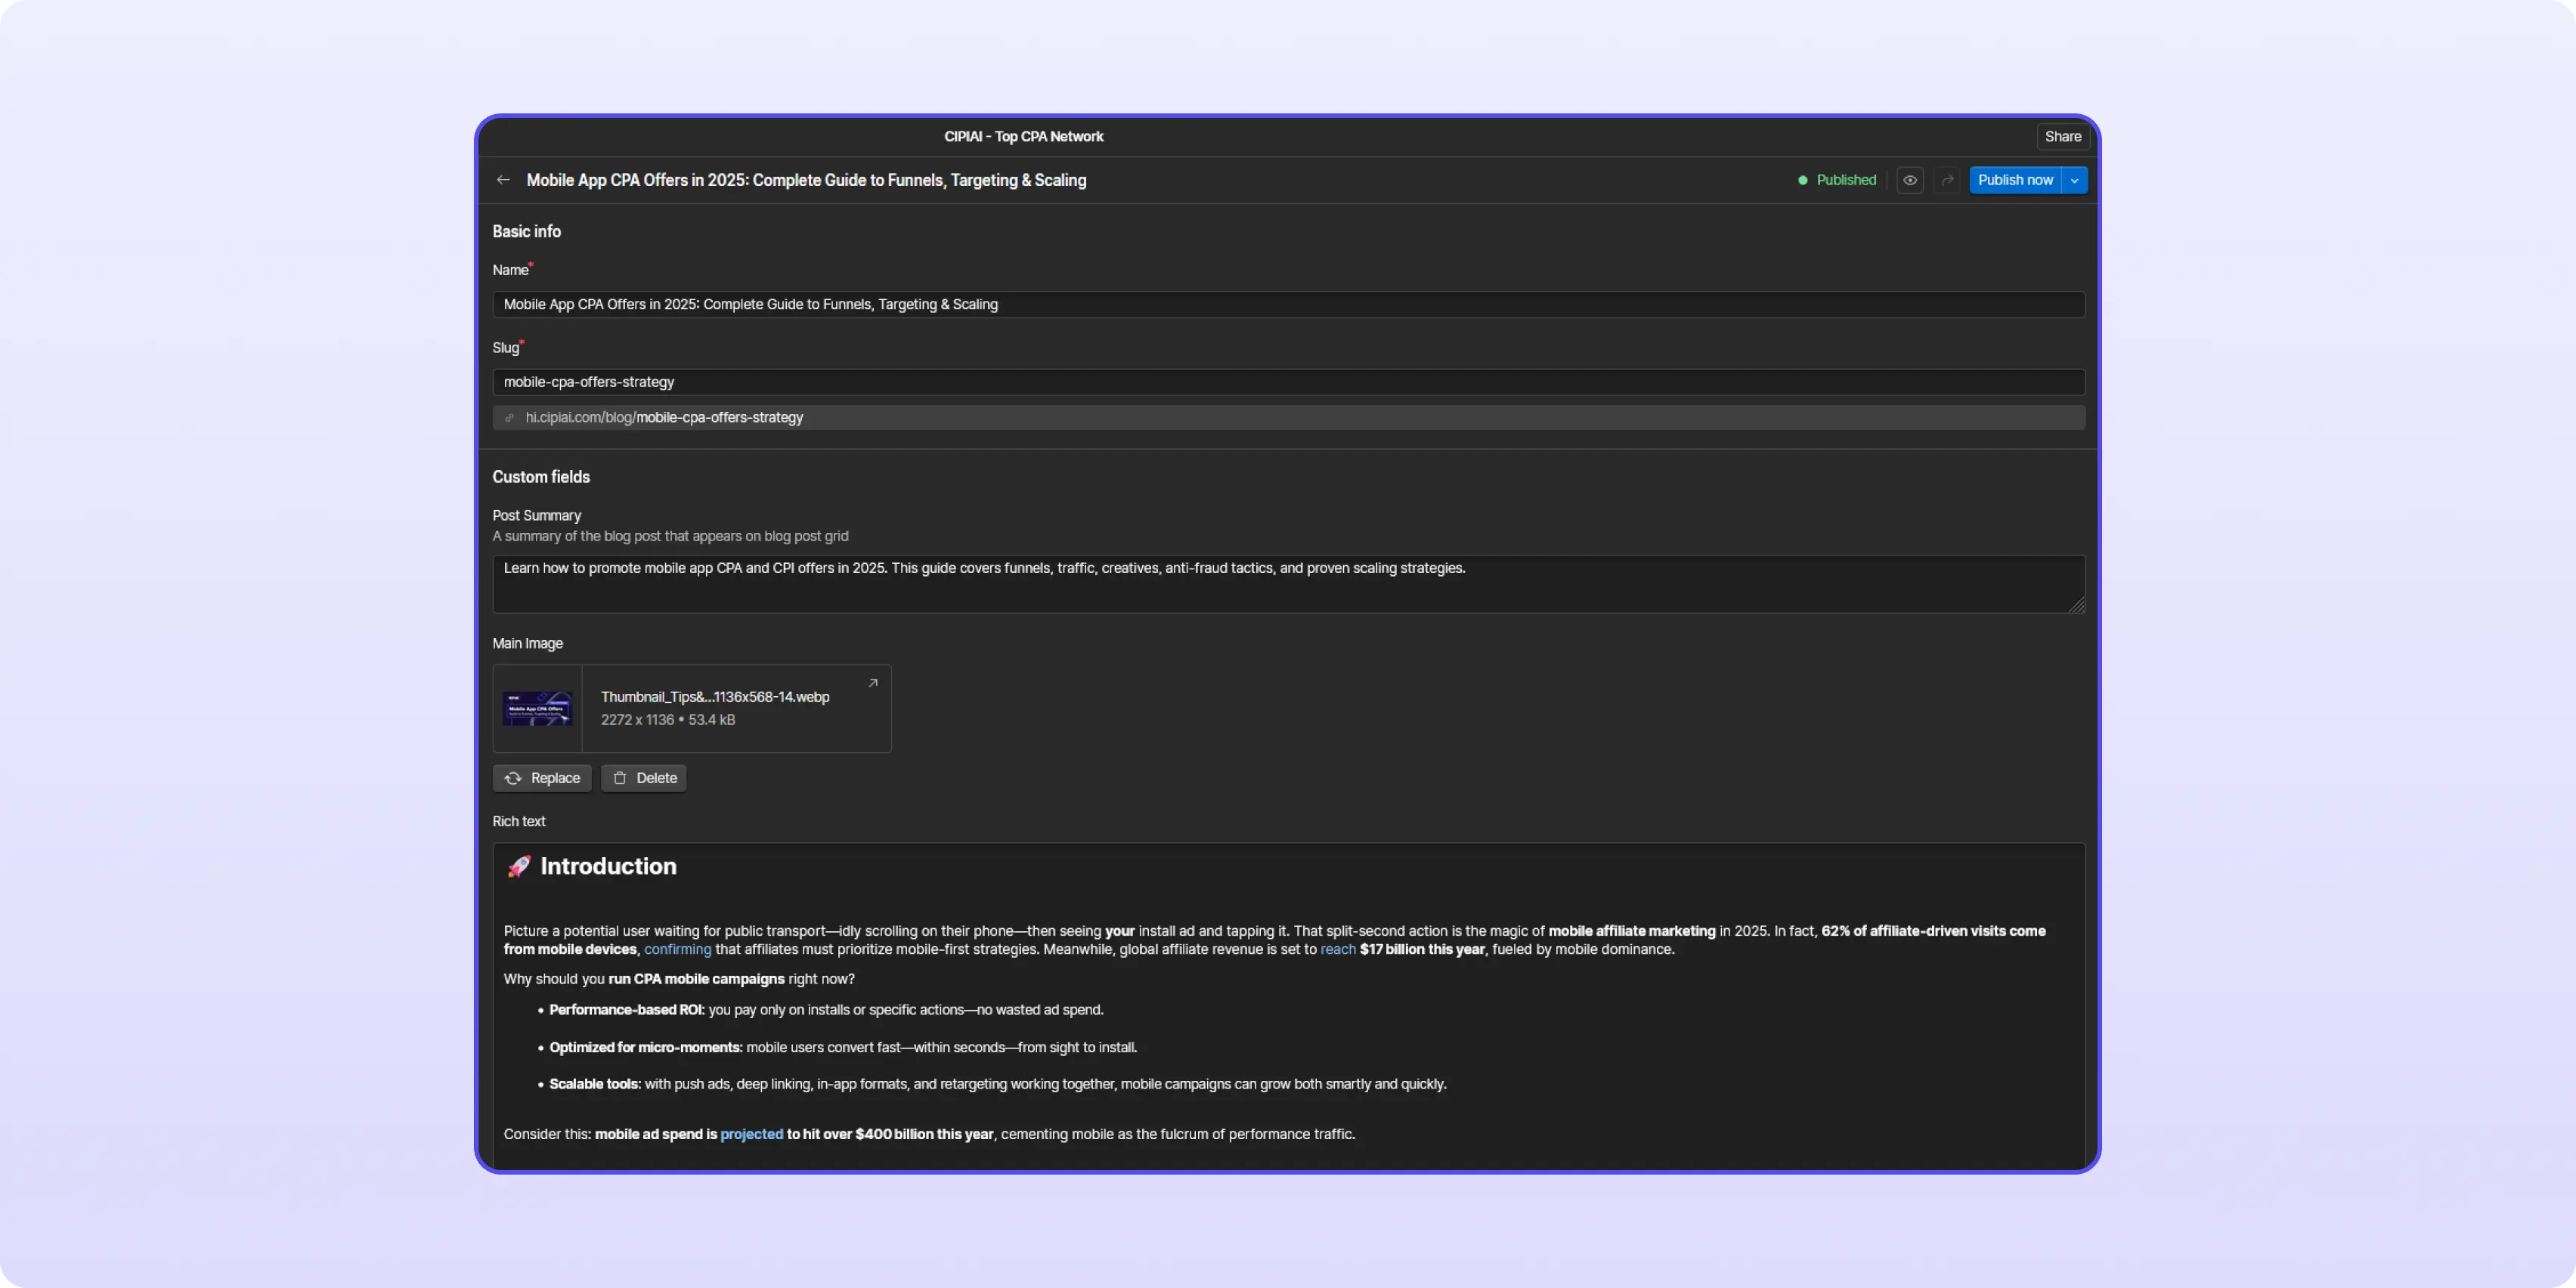
3. Add Sample Content to Your Collection
Add a few demo or real blog posts with titles, images, text, and links. This will help you preview how your blog layout renders on the live site.
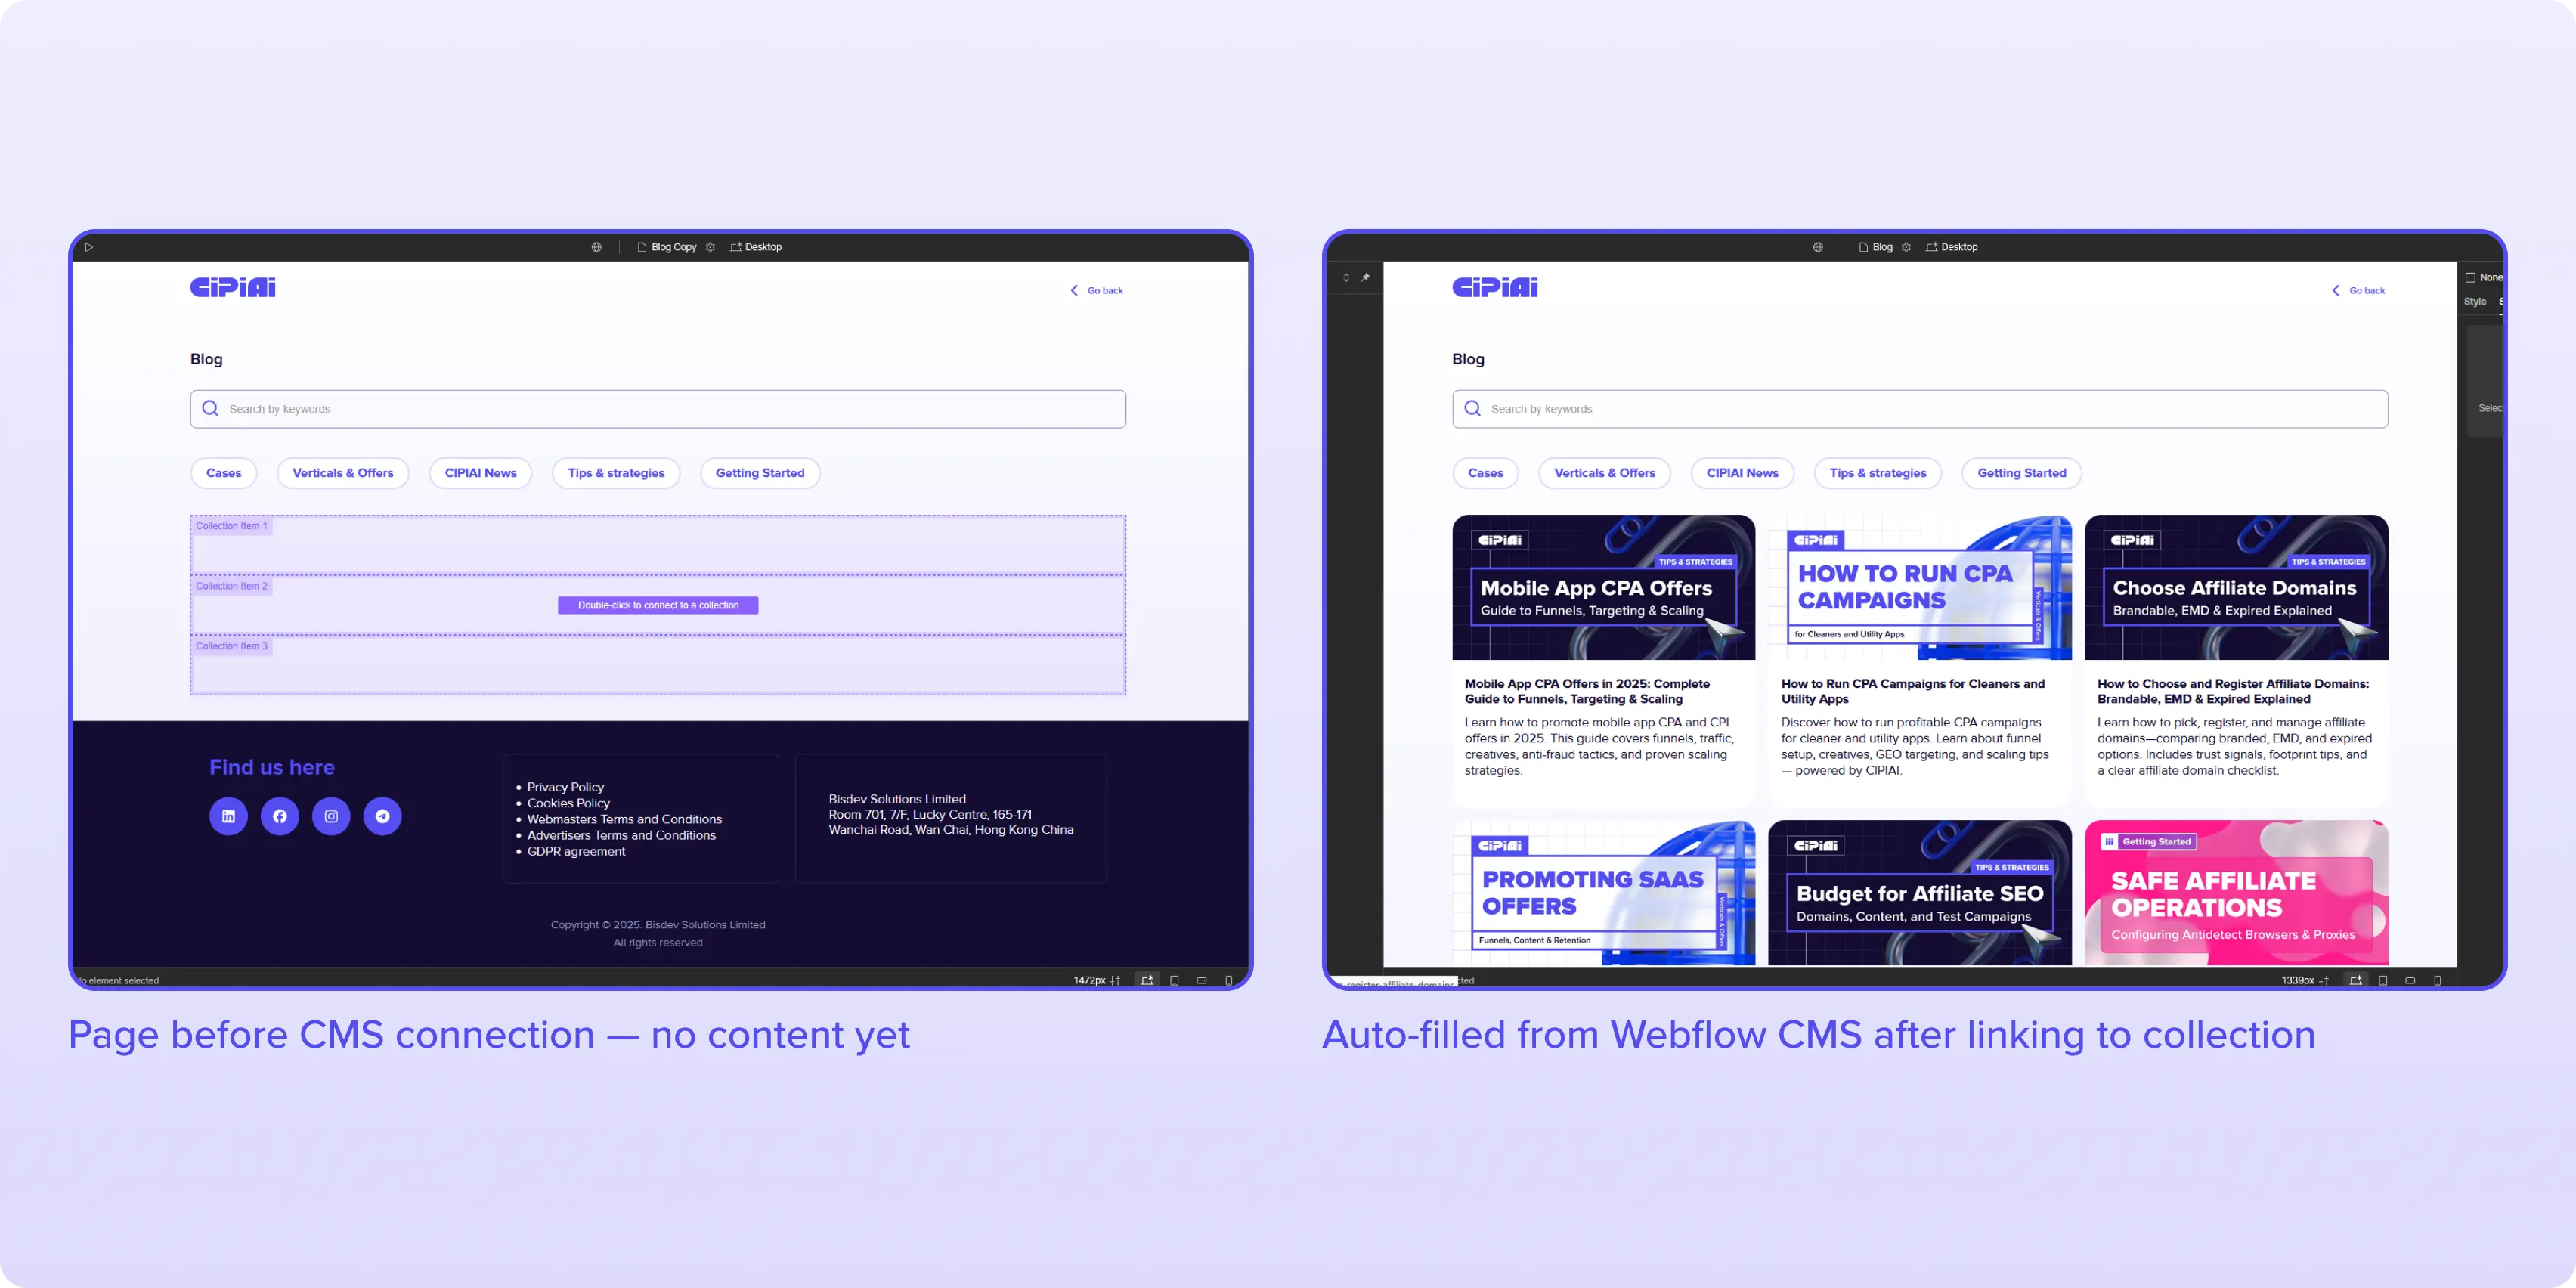
4. Connect Your Blog Page to the CMS
Bind the previously added Collection List element on your blog page to your CMS Collection. Design the layout to display key post info — titles, images, summaries, etc. This layout will dynamically repeat for each blog post.
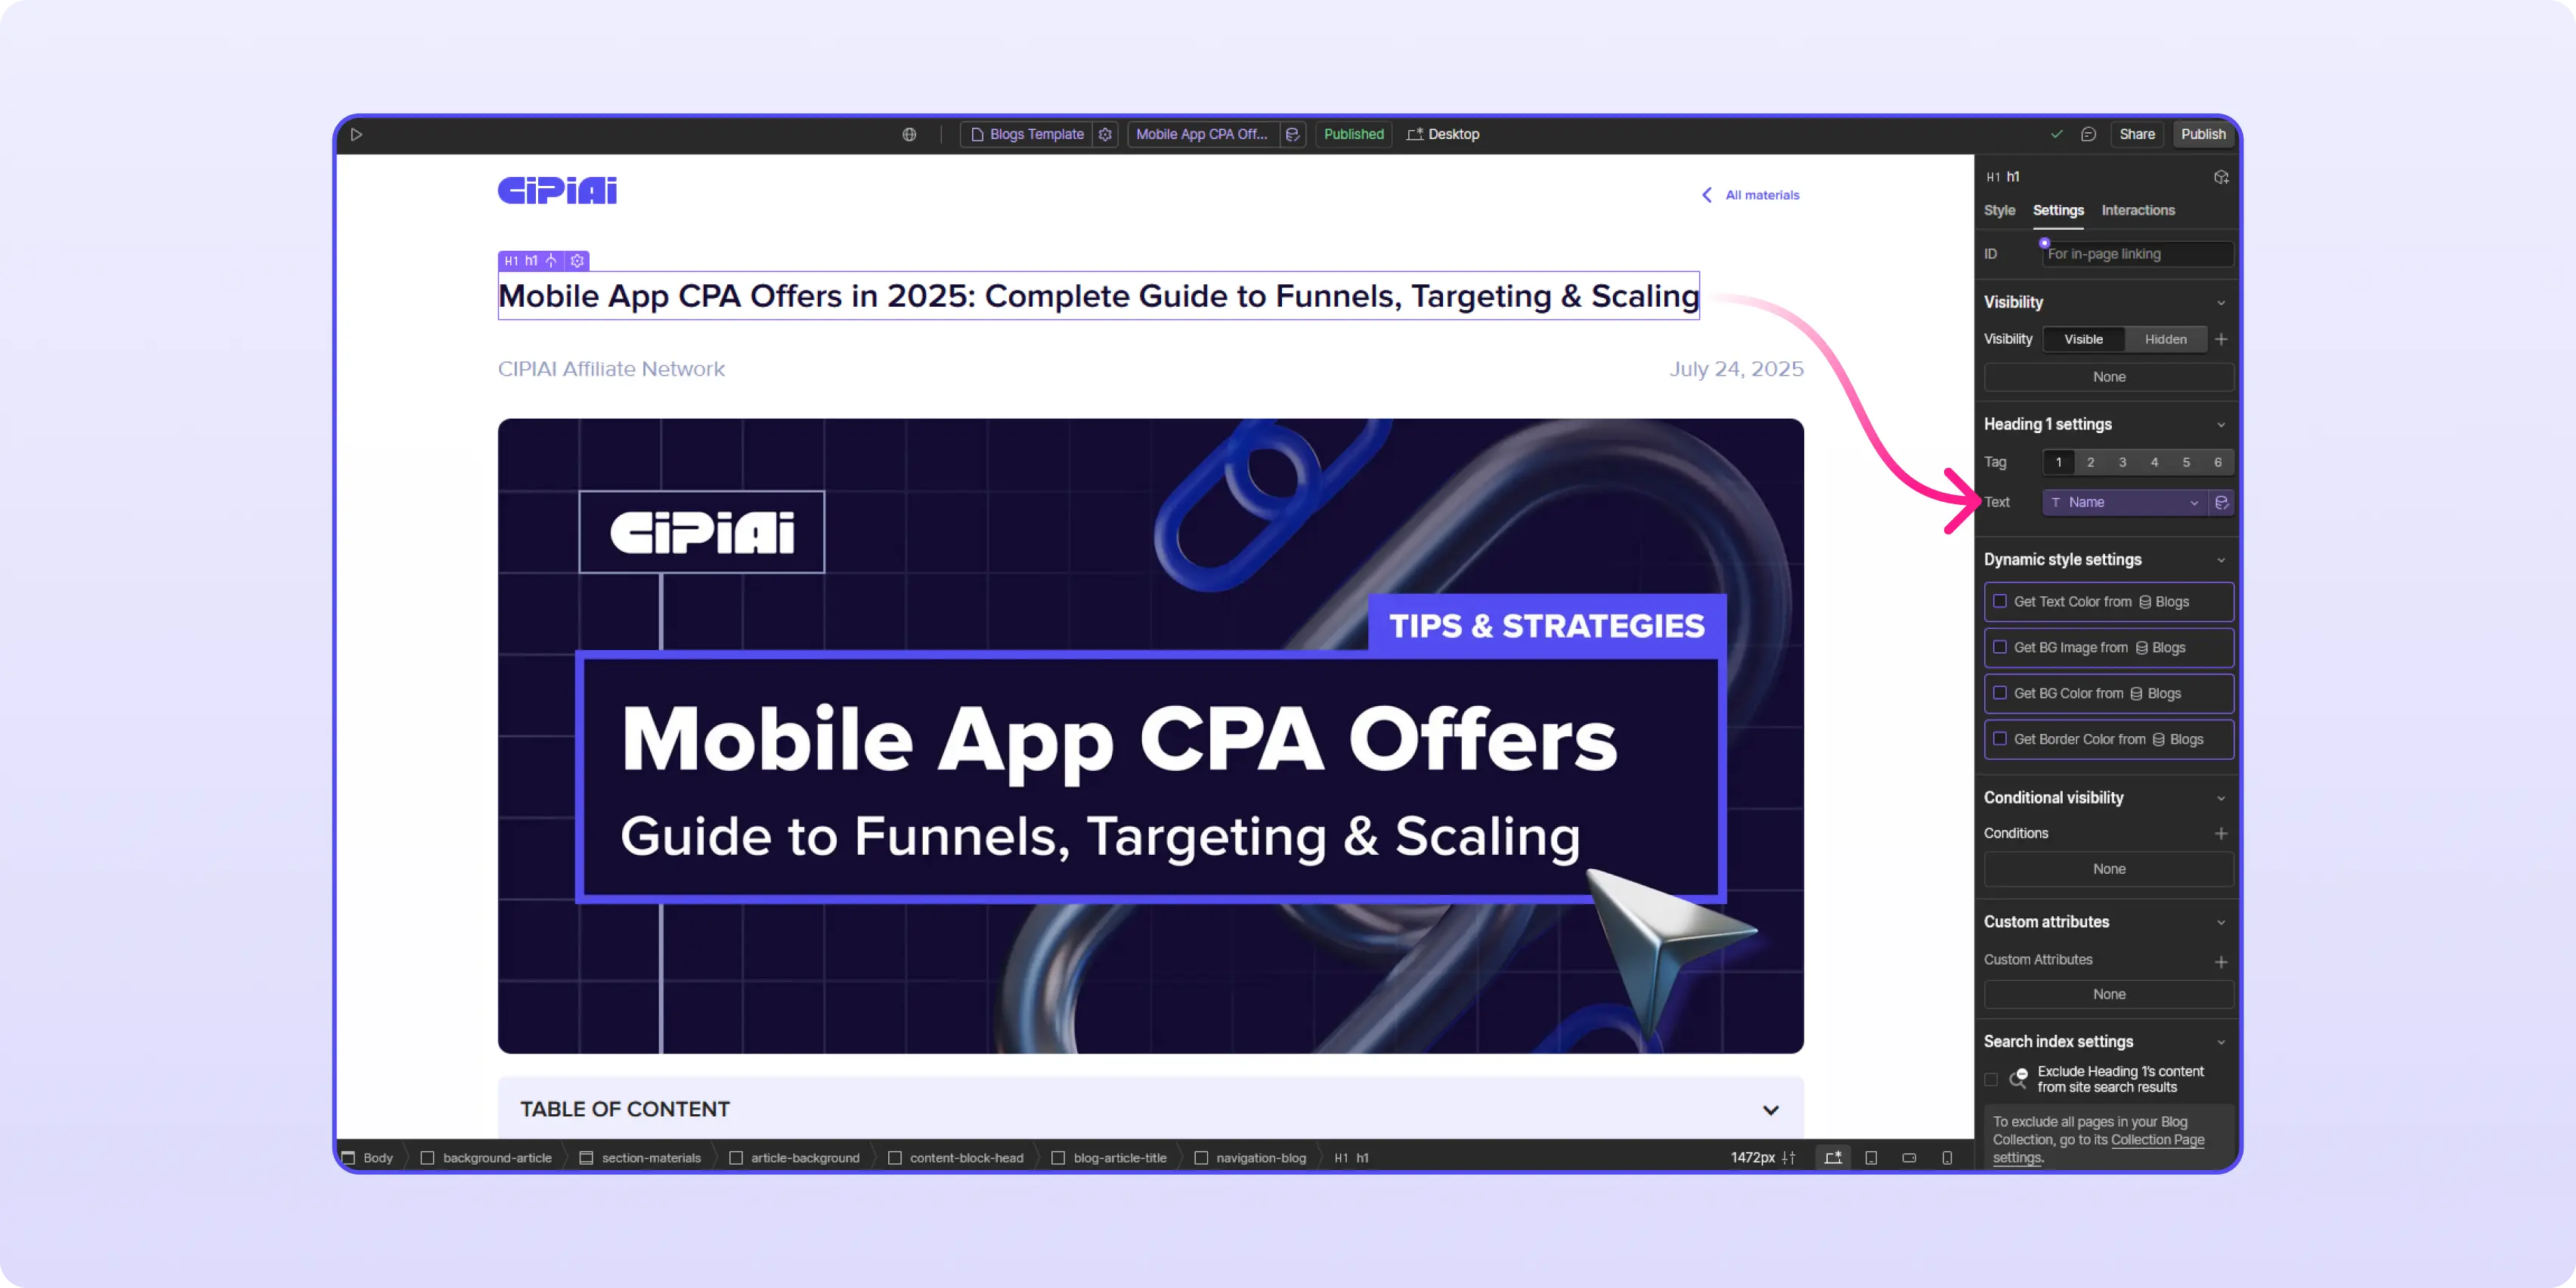
5. Design the Collection Template Page
Webflow automatically generates a Collection Page linked to your CMS, which displays the full post content. Design this page and bind text blocks, images, buttons, and affiliate links to the CMS fields so each post populates dynamically.
6. Preview and Publish
Use Preview mode to test how your dynamic content is rendered. Once satisfied, publish your site. All new posts added to your CMS will now appear automatically on the blog listing page.
Recommended CMS Fields for Arbitrage & Tech Affiliate Blogs
Each field in your CMS Collection corresponds to elements you create and style in the Webflow Designer. For example, the “Title” field links to a text block, the “Main Image” to an image element, and the “Affiliate Link” to a button or link block. Because these connections are dynamic, you only design your blog post template once, binding elements to these CMS fields.
As you add or update content in the CMS, your blog pages automatically populate and update without needing to design new pages for every post. Here’s an example of your CMS fields structure:
Simplify Content Updates with Rich Text Fields
Webflow’s Rich Text field allows you to format blog content using headings, images, quotes, links, and lists — all without code. To display this properly, use a Rich Text Element on your page and bind it to your CMS field. Don’t forget to style text elements globally for consistent formatting across posts.
Advanced Enhancements with Custom Code
To boost engagement and drive conversions, lightweight custom code snippets can bring interactive elements into your blog. These are added via Embed elements or in Project Settings → Custom Code.
Some powerful enhancements include:
- Countdown Timers for Limited-Time Offers
Add urgency by showing users how long a deal lasts. Perfect for promoting flash sales or exclusive drops.
- Animated Comparison Tables or Popovers
Help readers compare tech products or offers visually. You can implement these with custom HTML/CSS/JS or use tools like Lottie for smoother animations.
No-Code Visual Elements to Try
Even without code, Webflow gives you tools to improve user interaction:
- Interactive FAQ Accordion
Use native interactions to create expandable sections that answer common user questions. Great for SEO and UX.
- Animated Progress Bars
Show deal popularity or availability (e.g., “Only 12 spots left!”) near CTAs. Use Webflow’s animation tools or Lottie integrations for lightweight, engaging visuals.
Power User Tip: Use Finsweet for Advanced Blog Filtering
Finsweet’s CMS Library significantly extends Webflow’s native filtering:
- Multi-criteria filters let visitors refine posts by product type, GEO, or traffic source simultaneously.
- Instant search loads results without full page refreshes.
- Load More pagination enhances UX on content-heavy pages.
Example Scenario: A visitor searching “VPNs for Canada” selects VPN and Canada filters via Finsweet menus, instantly revealing relevant blog posts with targeted offers—automatically and without additional manual curation.
Make sure to follow Finsweet’s latest setup docs for smooth integration.
Maximizing Blog Impact: Best Practices
Regularly update your CMS fields and affiliate URLs as offers or campaigns shift—your content stays accurate without redesign.
- Analyze visitor data to find top-performing GEOs and product niches, then prioritize content creation in those areas.
- Utilize Webflow’s SEO settings on Collection Templates (custom meta titles, descriptions, Open Graph) to improve organic visibility.
- Integrate Google Analytics for detailed tracking of user behavior and conversion funnels.
- Use Webflow’s built-in preview tools to ensure responsive mobile and desktop experiences—critical for app or utility offers.
Conclusion
Webflow CMS Collections offer a powerful yet accessible way to manage dynamic, monetized blogs. With flexible custom fields, rich text formatting, optional advanced coding, and powerful tools like Finsweet for enhanced filtering, you gain full control to scale effortlessly.
This system keeps your blog fresh, relevant, and optimized—allowing your content to work as a seamless pre-sell engine that converts readers into customers without overwhelming them with ads.
