How to Set Up and Test Postback
Setting up your postback correctly is key for accurate conversion tracking, campaign optimization, and smooth reporting. Don’t worry — even if you’re new to this, CIPIAI makes it easy.
This guide will walk you through the essential steps to configure and test your postback. Just follow the steps below to make sure everything is working as it should, so you can focus on scaling your campaigns with confidence.
✅ What Is a Postback?
A postback is a mechanism for automatically sending conversion data from CIPIAI (or the advertiser’s system) to your external tracking system — whether it’s a third-party tracker or your own backend.
Why it matters:
- 🔍 Real-time conversion tracking
- 📊 Accurate traffic source analysis
- 🔄 Automated campaign optimization
- ⚖️ Transparent and trusted reporting
🔗 Types of Postbacks
CIPIAI supports two postback types:
🔧 How to Set Up Your Postback in CIPIAI
Step 1: Go to Tracking Tools
- Log in to CIPIAI
- Navigate to Tracking Tools from the left-hand menu
- Paste your postback URL in the appropriate field
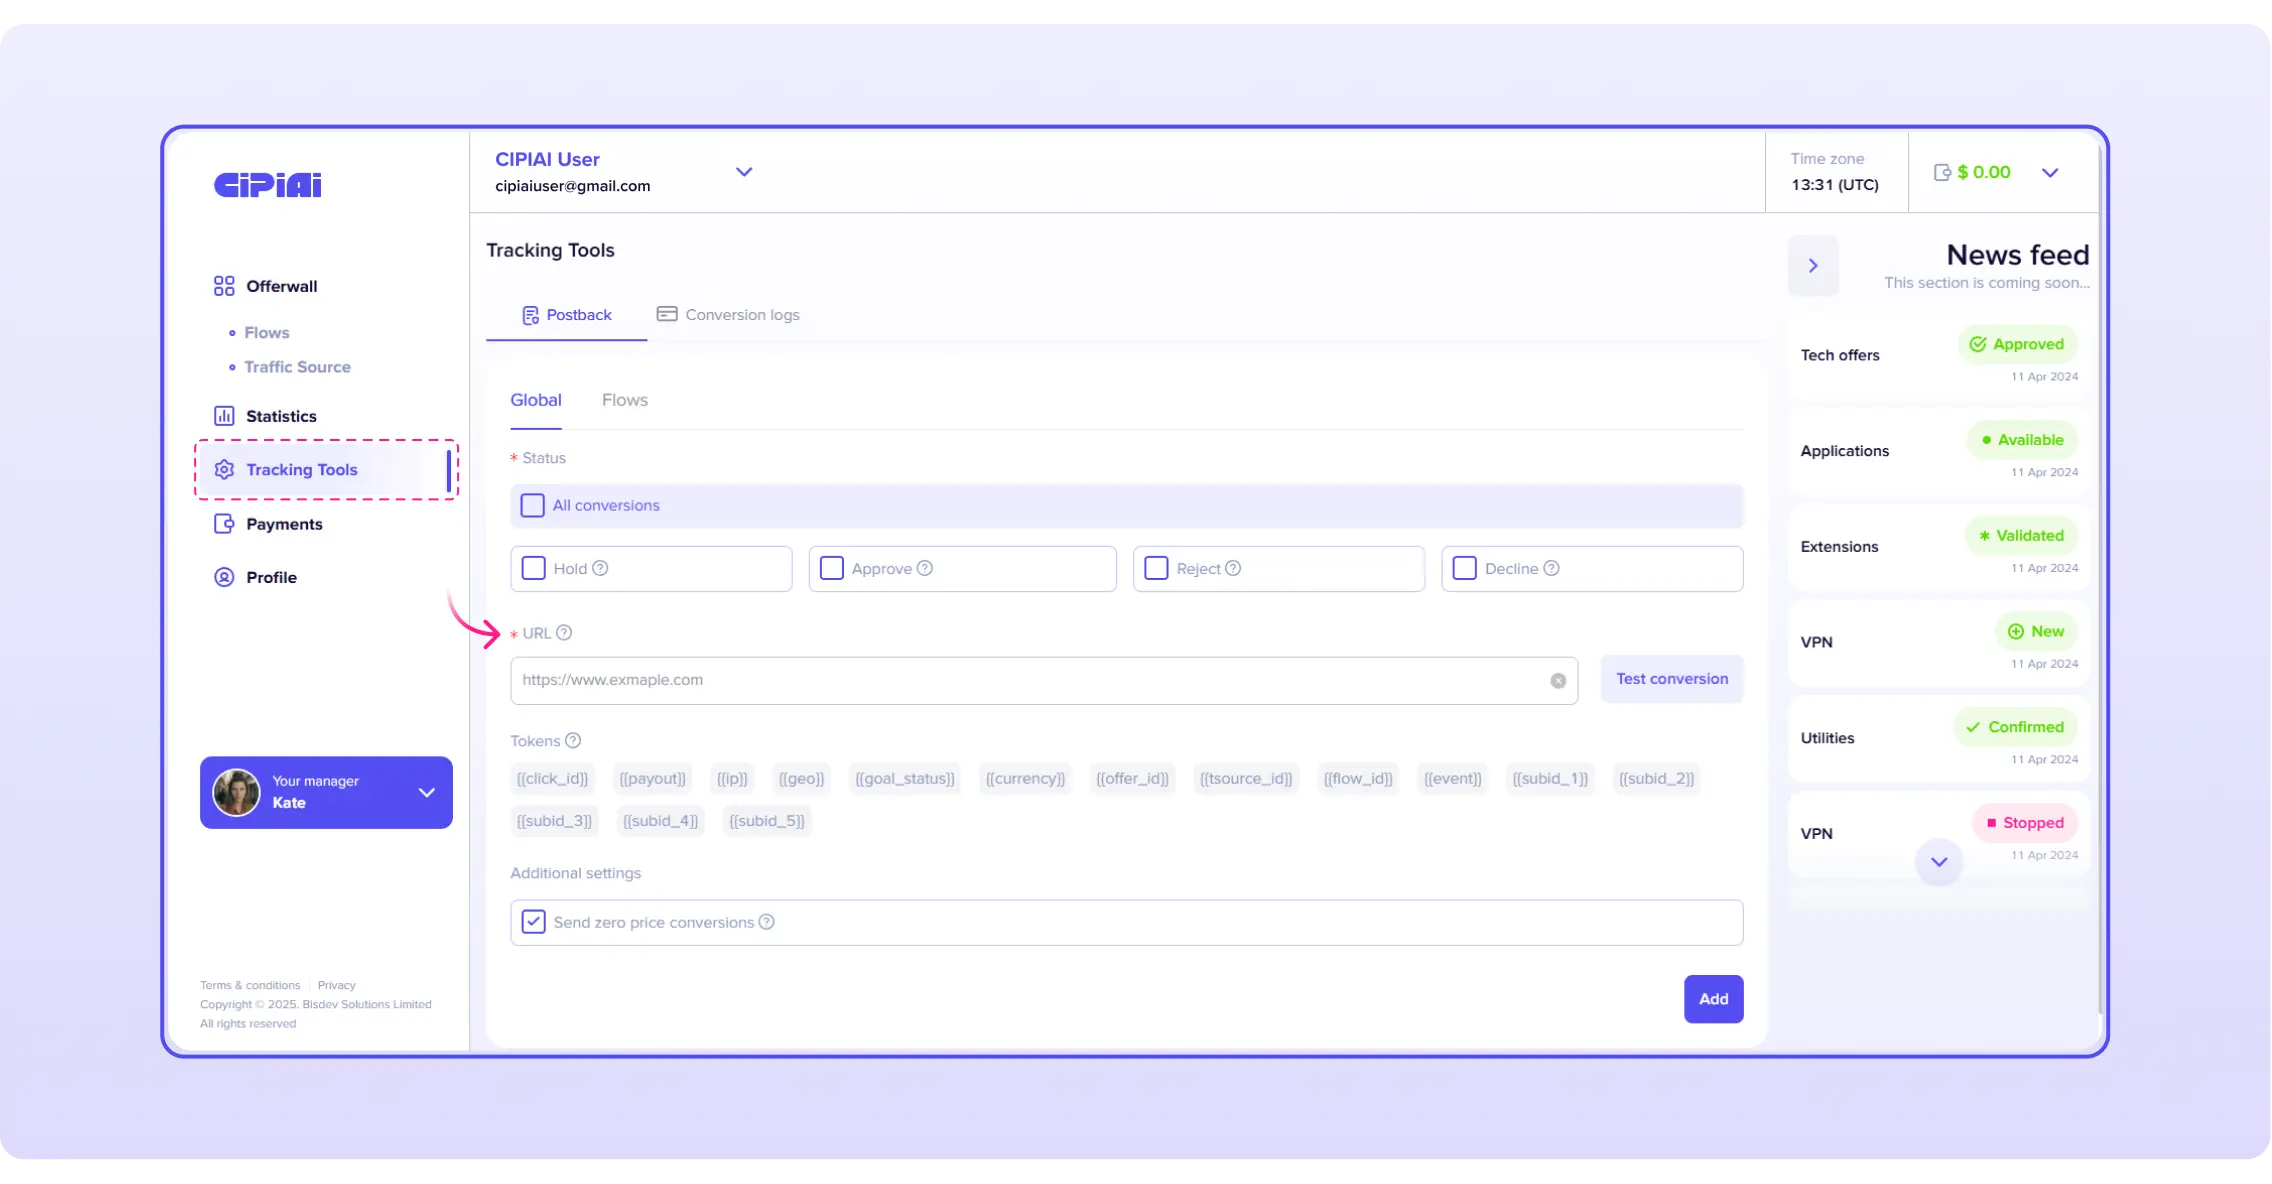
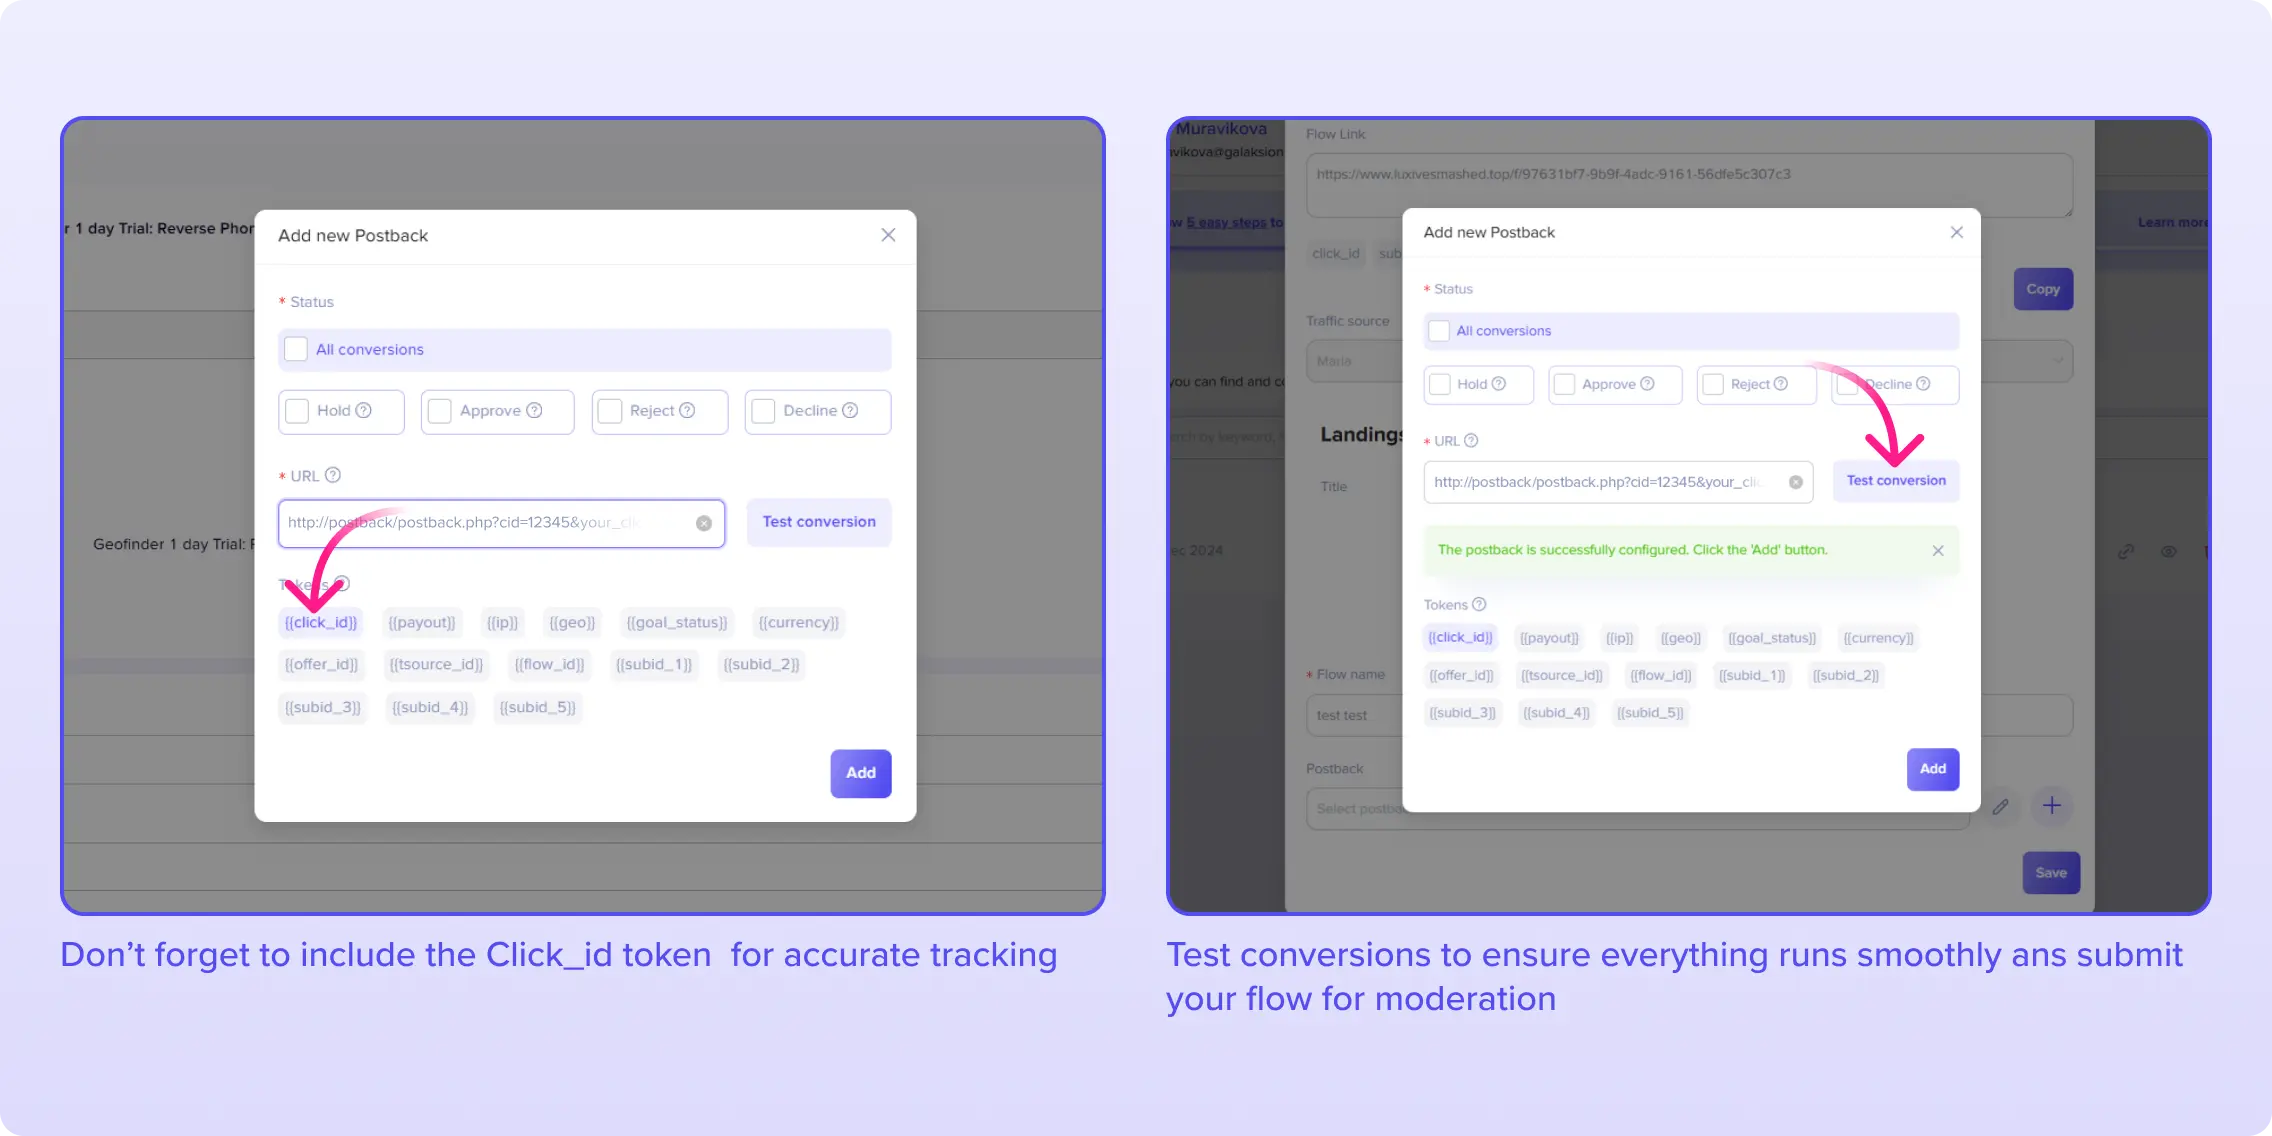
Step 2: Add Macros
- Fill in your postback URL with the appropriate tracking macros
- Your postback URL should include dynamic macros to send data:
https://yourtracker.com/postback?click_id={{click_id}}&payout={{payout}}&goal_status={{goal_status}}
Supported macros:
- {{click_id}} — unique click identifier used to track the traffic source.
- {{payout}} — payout amount for the conversion or install.
- {{ip}} — IP address of the user who generated the click or conversion.
- {{geo}} — user’s geolocation, typically includes country or region.
- {{goal_status}} — goal status (e.g., conversion, install, etc.).
- {{currency}} — currency used to calculate the payout.
- {{offer_id}} — ID of the offer that triggered the conversion.
- {{tsource_id}} — ID of the traffic source from which the click originated.
- {{flow_id}} — ID of the flow (funnel) associated with the click.
- {{subid_1}}, {{subid_2}} … {{subid_5}} — custom tracking macros that allow passing additional parameters; can contain any data (e.g., creative ID, ad ID, segment, etc.).
Step 3: Select Conversion Statuses
All conversions – includes all conversions, both approved and rejected.
Hold – the conversion is on hold and undergoing preliminary verification.
Approve – approved conversion; counted and payable.
Reject – rejected conversion, for example, due to duplicates or fraud.
Decline – declined for other reasons, usually at the advertiser’s discretion
Note:
The selection of statuses depends on your tracker’s technical capabilities. It’s best to check with them which statuses they support. In many cases, using only the "Approved" status is sufficient.
Step 4: Run a Test Conversion
You can check if your postback is set up properly
- Use the “Test Conversion” button to verify your postback setup. It triggers a simulated conversion without an actual click ID
This checks whether your tracker responds correctly
❗️Common Postback Errors & What They Mean
📌 Final Tips
- Always use HTTPS in your postback URL for security
- Use real parameter values when testing (not just macros)
- If you’re unsure about your tracker’s setup, contact CIPIAI support
